

Making homemade pita bread is so easy to make right on your stove top. You’ll never have to buy flatbread again!

WANT TO SAVE THIS RECIPE?
homemade pita bread is an easy skill to master
Depending on where you live, it’s possible you’ve never tasted really good pita bread before. The stuff in the plastic bags at the supermarket is like cardboard compared to the soft, pillowy texture of homemade. The bread served in Middle Eastern restaurants isn’t always much better. In Los Angeles we found wonderful pita at our farmers market, and at one or two favorite restaurants. Here in Wisconsin, we’ve had to rely more on our diy skills.
pita bread is one of the perks of an incredibly healthy Mediterranean diet!
Pita bread is your reward for eating all those healthy fats and fresh veggies. We eat vast quantities of hummus in our house, so this recipe is tried and true. It’s a basic, no skills required bread, but even though it’s a simple process, you’ll still get that primal thrill when you turn flour and water into pillowy rounds of soft, warm bread. Rip it, cut it, fold it, wrap it, or stuff it — it’s a wonderfully versatile, nourishing food.
why make pita bread from scratch?
The first and obvious reason is because it’s simply better. Better than anything you’ll buy in your local store. When you make it homemade it’s soft, puffed, and chewy: nothing like the dry stuff in bags.
And if you appreciate good Mediterranean food, pita bread is a staple. If you take pride in your own homemade hummus it’s only natural that you’re going to want really good pita bread to go with it.
I’m going to be using the word soft a lot, I can tell, but that’s what I love about it. We will definitely experiment with whole grains eventually, but for this first recipe I’m sticking with all purpose flour, I think it makes a more appealing pita.

ingredient list for pita bread
You can definitely experiment with whole grains, but for this recipe I’m sticking with all purpose flour, I think it makes a very appealing classic pita.
- flour ~ we’re using all purpose here.
- yeast ~ I like to use Instant Yeast, and make sure your packets aren’t expired.
- salt
- olive oil
- water

how to make homemade pita bread, step by step
- Dump your ingredients into a stand mixer fitted with the paddle attachment. (You can do this by hand if you prefer, but it takes elbow grease.)
- Mix on low to combine, then turn the speed to medium and let the machine knead the dough for 5 minutes. You will probably have to stop and re-arrange the dough from time to time as it tends to climb up the paddle.
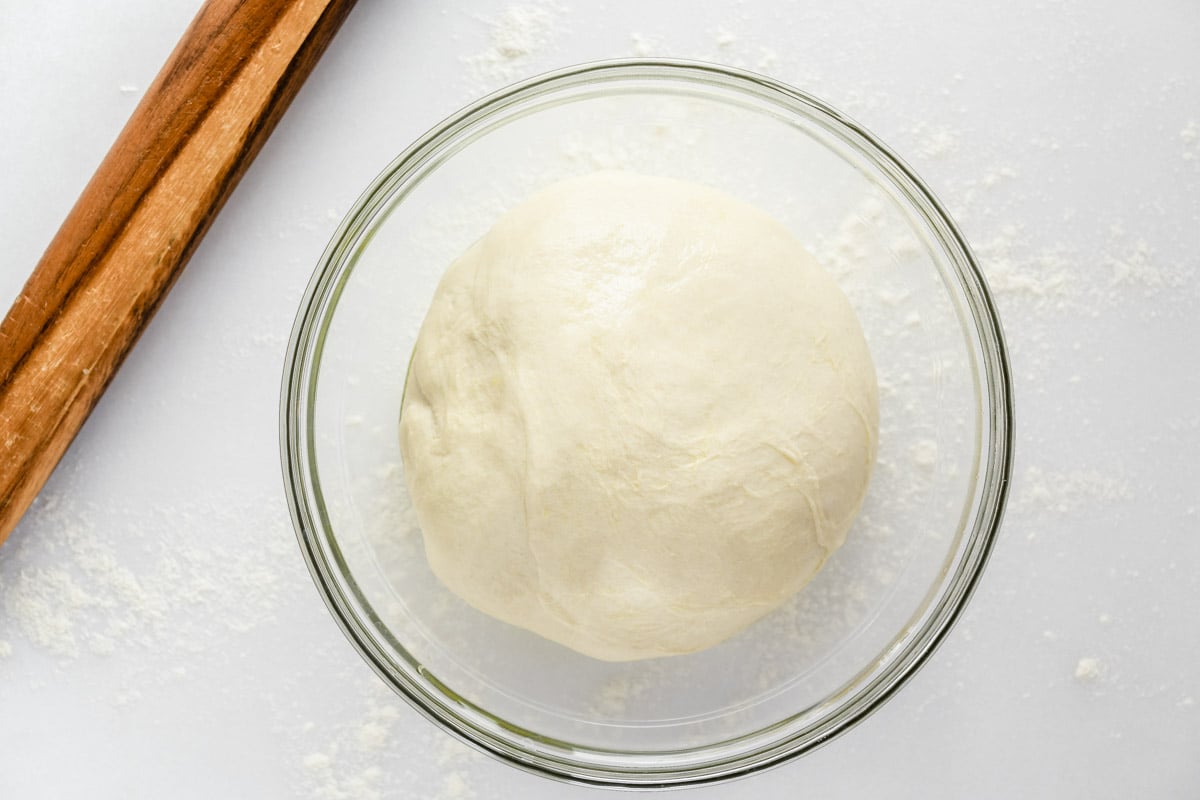
- Lightly coat the dough with oil, put in a large bowl, cover with plastic wrap, and let rise for an hour to an hour and a half in a warm place. It should double in bulk.
- Punch down the dough and cut it into 8 equal parts. Form into smooth balls and cover completely with plastic wrap so it won’t dry out.
- Roll out each ball on a lightly floured surface. Use the same principle you would for pie dough; you want to roll from the center out, constantly shifting your rolling pin around the circle to keep it even. Don’t fret if you can’t get perfect circles, it doesn’t matter in the least.
- Cook the pitas on a hot griddle or skillet. I like to use cast iron. 30 seconds on the first side, one minute on the second, then flip once more for another 30 seconds or so. Sometimes they will puff up dramatically, but most often, not.
- The minute they come off the heat stack them and cover with a clean kitchen towel. The steam softens the bread and gives it the perfect texture. When they’re cool, store them in zip lock bags.

what’s with the puffing?
The dough cooks right on the stove top (just like my homemade English muffins!) on a hot griddle or pan, in just a couple of minutes. Get the pan hot, at medium high heat, and leave it there. I’ve cooked these on both gas and electric stoves and you’ll have to find the sweet spot for your particular stove. My gas burner goes from 1 to 7, and I kept it at mark 5. You’ll need to experiment a little to get the temperature right on your stove.
The dramatic puffing that you see above is a little unreliable…sometimes it puffs, sometimes it doesn’t, and it’s a little hard to predict. but the bread is great either way. The puffing is what makes the inner pocket, so that you can cut it and open it up, but I don’t generally use my pita that way, and I prefer the thicker, ‘pocketless’ version.

turn your homemade pita bread into pita chips
Homemade pita bread is one of those super satisfying projects. If you like hummus or other Middle Eastern dips you need to try this recipe. My husband likes to cut the bread in small triangles and toast them with a brushing of olive oil and a dash of seasoning, but mostly I like to use them as is, to enjoy their wonderful fresh baked quality.
For a slightly different spin on a Middle Eastern flat bread, try my Laffa Bread recipe!

what to eat with your homemade pita
- Lemon Artichoke Hummus
- Instant Pot Hummus
- Muhammara (roasted red pepper & walnut dip)
- Spiced Lamb Meatballs with Hummus
- Jalapeño Goat Cheese
- Smokey Baba Ganoush
- Warm Hummus with Mushrooms
- Kofte Bowl with Warm Spiced Yogurt
“I made this last night and it was the most satisfying, easy project! Your instructions were great and the pita turned out beautiful and delicious. I’m going to try your laffa bread recipe today. Thank you!”
LINDSEY

How to Make Pita Bread
Ingredients
- 1 cup warm water at about 100F, or warm but not hot to the touch
- 2 tsp (or 1 packet) active dry yeast
- 1 Tbsp olive oil plus more for coating the dough and oiling the pan
- 2 tsp salt
- 3 cups all purpose flour
Instructions
- Put the warm water in the bowl of a stand mixer (or a regular bowl if doing by hand) and sprinkle in the yeast. Let it sit for 5 minutes.
- Blend in the oil and salt, and then mix in the flour. Once the flour is incorporated, knead for 5 minutes until the dough is soft and elastic.

- Coat the dough lightly with oil and place in a clean bowl. Cover with plastic and then a clean kitchen towel. Let rise in a warm spot for an hour, it will double in bulk.

- Turn the dough out onto a floured surface. Cut it in half, and then cut each half in half, and then cut each one in half a final time, so you have 8 total.

- I like to take each piece and form a round ball, that way it is easier to roll out evenly. Keep the rest of the dough covered as you work with each piece.

- Roll out one of the pieces of the dough into approximately a 6 inch round.

- Heat a skillet or cast iron pan on medium high until it is hot. My gas range goes from 1 (low) to 7 (high) and I kept the heat at mark 5. Lightly oil the pan for the first piece of dough, but after that you should be fine without adding anything additional.
- Lay the round of dough on the hot pan and cook for about 30 seconds, until you start to see bubbles, or lumps, appear. Flip it over and cook for one minute. Then flip it again, and cook for a final minute.
- Remove the bread and immediately wrap it in a clean kitchen towel. The steam will keep it soft. While one pita is cooking you can be rolling out the next piece of dough.
- Repeat with the rest of the dough, and keep all the pitas stacked inside the towel until they have cooled. Then you can store them in plastic baggies.
- Your pitas will last several days, or you can freeze them for longer storage.
Notes
- The puffing can be a little bit capricious…if you really want it to puff and make an inner pocket, roll them on the thin side and make sure your pan is preheated. These can be cooked in the oven, but again, I tried that and wasn’t happy with the results. The pan gives you more control.


My daughter is allergic to dairy product, even a small quantity of milk will leave bad effect on her. Breads means butter and milk, so its out of the question.
She loves to eat Indian and mexican dishes but those frozen pack breads leave a frozen food aroma to the bread when cooked. I have been trying other recipee from other post but so far Yours is the easiest and have the bread fluffy concistency we prefer. Thanks a lot!
Great news, Nelson ~ I also have recipes for homemade tortillas, (http://theviewfromgreatisland.com/minimal-monday-black-bean-corn-and-mango-salsa-with-homemade-tortillas/) and Naan bread is next on my list!
Can you double the recipe or would I need to make the batches separate? Not sure if a double batch would rise right?
I would probably just make two batches, Chrissy.
Just tried this with my kids and it was super easy and turned out amazing! Thanks for sharing, I will never buy pitas again.
Fantastic, Michelle ~ these will come in so useful with kids, and how nice that maybe they can learn to make their own 🙂
Hi, I’ve just used this recipe to make Turkish style (quorn) mince pittas for mine and my guy’s lunch, they were fun, easy and delicious!! Got a good puff on one of them too in the frying pan on a hot electric hob 🙂 will definitely be doing this again! Thanks!
Wondering if this would work with gluten free flour, have you tried that?
I haven’t tried that, but I’m pretty sure the texture would not be as ‘chewy’. It’s worth a try, maybe I’ll do an experiment and get back to you!
I cannot wait to try this. I love bread. This looks easy. I am usually intimidated by anything with yeast. But this one looks like even I can make. I will let you know how it turns out. The only question I have is the recipe does not state what to do with the yeast I presume you put it into the water with sugar and let bloom?
The ads on this post are out of control. Had to try 4 times before I could even see your content. Looks like a great recipe but don’t know if I can clear the ads long enough to read it.
Shari do you mind telling me if you were on your phone, or desktop? I definitely want to fix that, sorry!
Same here! On my iPhone – I can’t hardly read your posts because of the ads in the way, and sometimes it just suddenly redirects to an ad page!
I’m on my Samsung Tablet and am having the same issues, it’s horribly bad!
Agree. Can’t get to the content while using iPhone. I’m in advertising and get the value of it but these pop ups and interstitials actually lose readers for you when done this much. I’ll try again
made these the other night and they were perfect – thank you. Planning on making again tomorrow but using some of the dough balls for my kids to make into individual pizzas for the oven. I think they would prefer toppings baked on while bread cooks in oven vs. putting toppings onto pan cooked pitas. Recommendations for temp. and cooking time if I put dough with toppings in oven to bake?
thank you
What a fun idea Lucia ~ I’m going to take a guess and say 400F because pizza usually cooks at pretty high temps ~ let us know how they turn out!
It seems that when I make pitas that they seem to puff better if I let them sit (covered) for 15-20 minutes after rolling them out.
I made these today and they turned out amazing! Only one of them puffed I don’t know why, may be I flipped them too early or too late. They taste so much better than the store bought ones! Thanks for this recipe 🙂
You’re so welcome, Cidi, I hope you get lots of enjoyment out of this recipe 🙂