
How to make classic Crème Brûlée with simple step by step instructions for silky vanilla custard topped with crackly caramelized sugar ~ using a kitchen torch, or your broiler. Everyone should know how to make this epic dessert!

WANT TO SAVE THIS RECIPE?
Crème Brûlée is Dessert with a capitol ‘D’
It’s what we order at the fanciest restaurant, it’s what we dream of after a romantic meal, but it’s not something we think we can pull off in our own kitchen. But with my foolproof recipe and pro tips, you’ll have this classic custard under your belt in no time. This recipe is a testament to the magic of cooking: it takes eggs, cream, and sugar and transforms them into one of the world’s great desserts. Let’s get to it!

gather your (5!) ingredients:
Seriously, how simple could this recipe be?
- egg yolks ~ yes you’ll have some leftover whites, which will give you the perfect excuse to make meringues, or an extra healthy frittata.
- cream ~ either heavy cream or whipping cream are fine. You can also use half and half for this, but your final custard will be a bit thinner.
- sugar ~ granulated sugar sweetens the custard and creates the crackly topping.
- vanilla extract ~ 2 teaspoons. You could also use vanilla bean paste or vanilla bean seeds.
- salt ~ what would we do without it?

cook’s tips for making classic crème brûlée
Crème Brûlée scares off a lot of people, probably because it has an unapproachable restaurant-only aura about it. But it’s really just a simple custard topped with a little bit of burnt sugar! Yours will taste divine if you keep a few things in mind…
- Make sure your oven is preheated, and at the correct temperature, and that you use very hot or boiling water to fill your pan, or bain Marie.
- The custard will likely still be wobbly when it’s finished cooking. This is normal, and it will firm up as it cools on the counter, and then chills in the refrigerator.
- After I take the custard out of the oven I let it sit in the water, in the pan, for 15 minutes. Then I remove the cups, and let them cool a bit more on the counter before refrigerating them. By the time you move them to the refrigerator they should not be wobbly anymore.
- Make sure to chill the custard thoroughly. If you don’t chill the custard thoroughly it will turn out runny, and you don’t want that.
- When sprinkling sugar on the chilled custard make sure the layer of sugar is flat and even so it caramelizes at the same rate.
- Practice with your kitchen torch beforehand so you know how it operates and what setting works best. I like to put some sugar on a sheet of foil for testing.
- Position the flame perpendicular over top of the custards with the tip of the flame about an inch above the sugar. Starting in the middle, keep it moving in a circular motion working from the center out to the edges. Remove the flame as the sugar bubbles and turns a deep golden color. A little black is fine.
- Let the sugar set up for a few minutes before serving.
- You can make these ahead and refrigerate, but be aware that the sugar coating will not be as crisp. A better idea would be to make the custards ahead, and then do the sugar topping when ready to serve.

Do you have to have a torch to make crème brûlée?
No, you don’t need to have a torch. A kitchen torch is fun to use, and makes this dessert a bit theatrical, but you can also caramelize the sugar under the broiler.
Set the rack at the highest setting under the heat and preheat the broiler on high.
Put a single cup on a baking sheet and slide it under the broiler. Don’t blink: depending on your broiler the sugar can caramelize in seconds. I recommend doing one ramekin at a time because this happens fast and sometimes I need to rotate the cup a bit to get an even browning. If you’re dealing with several pots it could get dangerously chaotic.
Remove the ramekin when the surface has become a deep caramel color. Little bits of black are expected.
The idea is to caramelize your sugar fast, so the custard stays cold while the sugar melts.
In my experience this does not work quite as well as a kitchen torch, but it will work in a pinch.

If you don’t have ramkekins…
You can bake crème brûlée in any small glass or bowl that is oven proof such as small wide mouthed canning jars.
You can also bake it in a pie plate or square baking dish, but the baking time will be longer, and you will still want to bake it in a water bath.

More dreamy creamy desserts…
- Milk Chocolate Mousse
- Homemade Coffee Pudding
- No Bake Strawberry Cheesecake
- Meyer Lemon Pudding
- Old Fashioned Butterscotch Pudding
- Ina Garten’s Brownie Pudding
- Warm Lemon Pudding Cake

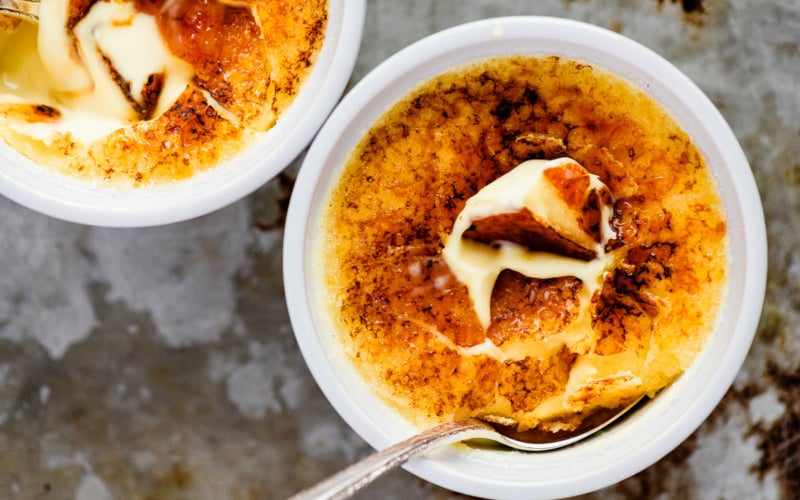
This is one of the best desserts I’ve ever eaten, I hope you give it a try!
The custard is smooth and silky, with just the right amount of vanilla flavor. And that burnt sugar crust is divine. I like to make the custards ahead of time and then brandish my torch after dinner, it never fails to impress.

Classic Crème Brûlée
Equipment
- kitchen torch (optional)
- small oven proof ramekins
Ingredients
- 4 large egg yolks
- 1/2 cup granulated sugar, plus extra for topping
- 2 cups heavy cream or half and half
- 2 tsp vanilla extract
- 1/8 tsp salt
Instructions
- Preheat the oven to 325F Set 4-6 oven proof ramekins in a square baking pan, or other pan that will fit them.
- Whisk the egg yolks with the sugar until smooth and lighter in color.

- Slowly whisk in the cream, salt, and vanilla.
- Fill the ramekins 7/8 of the way full. Note: I like to use a bowl with a spout to make filling easier.
- Add very hot water to the pan to come half way up the ramekins.
- Bake on the center rack for 40-45 minutes. The custard will still be wobbly, but it will firm up as it cools. Keep the custards in the pan with the water for an additional 15 minutes on the counter, then remove them to cool. Refrigerate for at least 4 hours or overnight.
- Sprinkle a scant teaspoon of granulated sugar evenly over the surface of each chilled ramekin. Use a kitchen torch to melt and caramelize the sugar. Do a test first to get used to how your torch works. Keep the flame moving in a circular motion until the whole surface has melted and turned golden. A little blackening is ok.

- Let the custards sit for 15 minutes before serving.


Nutrition


Aren’t you supposed to strain the mixture through a screen when you put it in the ramikens, so it comes out smooth?
No need here. For one thing there are no egg whites to curdle, but you can sieve it before pouring into your ramekins if you’d like!
Im not sure if i read it right. Do you not have to temper the eggs in this recipe? All i see is mix eggs and sugar and then add cream and vanilla
No, the custard cooks slowly in the oven, not in the saucepan like with a pudding or custard sauce, so you did it right.
Made this and we loved it. The second best thing about this recipe is that It was so simple to prepare! Now, if I make a large batch in advance for a party, what do you recommend for the torching part? I want the top to remain crunchy.
So glad you loved this Deb ~ if you make it in advance, definitely don’t torch it ahead. You could be dramatic and torch each custard as you serve them, so people can ooh and aah over the process. I’m not sure how big your crowd is ~ but you can also set them under the broiler, and depending how even your broiler heats, you could do a tray at a time.
What size ramekin do you use?
4 oz or 6 oz?
thanks
My ramekins are 5 ounce capacity.
How is the salt used? Do you sprinkle it with the sugar or you mix it with the eggs and cream?
Thank you for the recipe! I will try making them tomorrow ?
The salt goes in with the cream and vanilla 🙂
Do you add the vanilla to the cream before whisking it in with the egg yolks and sugar?
You can do it either way.
What brand or type of kitchen torch do you use?
I’ve had mine for so long they don’t make it anymore but it’s similar to this one.
Hi Sue! I would love to try this recipe, but I’m wondering how long they can be stored in the fridge before eating? Thanks!
I’d say up to 2 days, but be sure to brulee them right before serving. And you may need to blot the surface dry if there is any condensation from the fridge.
Creme brûlée is one of my favourites so thank you for the recipe. At the top of the recipe, it states it makes 6 servings yet you ask for the use of 4 ramekins. Can you clarify which it is & which the nutritional apply to. Loving your recipes…many thanks
Hey Judy, it will make 6, I only photographed 4, so that’s the confusion. The nutritional info is for 6 servings.