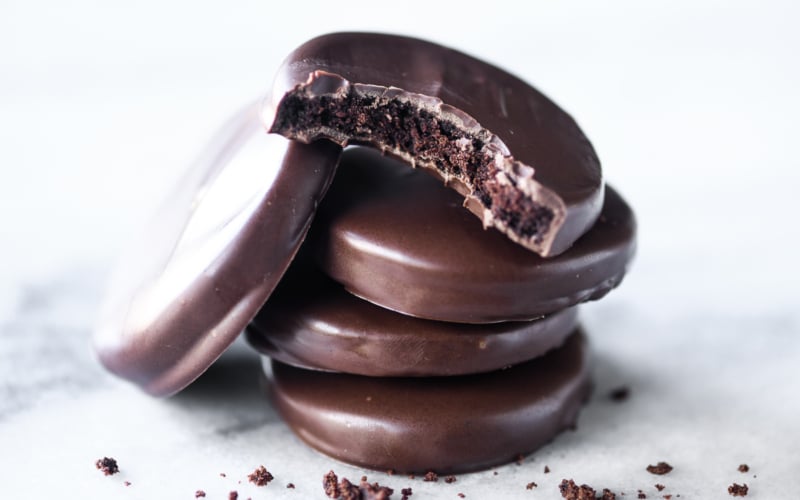

With my homemade Thin Mints recipe you can make these famous chocolate mint cookies in your own kitchen with quality ingredients. These copycat Girl Scout cookies are so much better than the originals!

WANT TO SAVE THIS RECIPE?
That’s right, my Thin Mints recipe is even better than the originals (sorry Girl Scouts!) My chocolate sugar cookie base is tastier, and the chocolate peppermint coating is richer (the originals don’t contain chocolate at all!) But don’t get me wrong, I have the utmost respect for Girl Scouts. I was a Girl Scout (my mother was a leader) both my daughters were Girl Scouts, and I’ve sold more than my share of cookies. Maybe it’s just me, but I definitely find that Thin Mints have lost their magic in recent years. Let’s just say it’s time to move beyond the green box to a truly special homemade Thin Mints recipe. You’ll never turn back!
Let’s dig in
- Why make a homemade Thin Mints recipe?
- Homemade Thin Mints recipe ingredients
- Peppermint extract
- How to make Thin Mints, step by step
- Tips for this Thin Mints recipe
- Homemade Thin Mints questions?
- Storing and freezing homemade Thin Mints
- This Thin Mints recipe is the perfect copycat
- MORE CLASSIC COOKIE RECIPES

Why make a homemade Thin Mints recipe?
Thin Mint cookies are probably the best known Girl Scout cookies of all time. They’re crisp chocolate wafers dipped in a chocolaty mint coating famous for their delicious flavor combination. They have a cult following and people have been known to hoard them. They also taste amazing straight from the freezer.
- The Thin Mints journey began in 1939 as “Cooky-Mints”. (Yep, they spelled cookie “cooky” in the 1930s!)
- They consistently rank as the top-selling Girl Scout cookie, accounting for roughly a quarter of all sales!
- Only two commercial bakeries are licensed to make Thin Mints.
- Did the Thin Mint recipe change? Yes! The Thin Mint recipe was reformulated to become vegan-friendly in 2015.
- IMO Thin Mints are not nearly as good as they used to be, have you noticed that too? This is why I developed a copycat Thin Mints recipe!

Homemade Thin Mints recipe ingredients
- all purpose flour
- cornstarch
- adds crispness to the cookie and helps prevent spreading.
- unsalted butter
- unsweetened cocoa powder
- I used Dutch process dark cocoa powder which gives your Thin Mints a deep rich color and chocolate flavor. Hershey’s Special Dark is commonly available.
- sugar
- egg
- vanilla
- salt
- dark or semi-sweet chocolate
- use bar chocolate, or melting wafers. I like Ghirardelli Dark Melting Wafers.
- vegetable or coconut oil
- this thins the chocolate for dipping. The presence of oil also helps the coating not seize up when you add the mint extract.
- pure peppermint extract

Peppermint extract
I use McCormick’s peppermint extract. Peppermint (not spearmint) is the standard choice for achieving the classic thin mint flavor.
Official Girl Scout Thin Mints are made with peppermint oil. You can use it, but be cautious because it’s very potent and you will only need a tiny bit. Add to taste.

How to make Thin Mints, step by step
step 1. Mix up your dough
- Cream your butter, sugar, cocoa powder and egg. Then add the flour and cornstarch to form your dough.
step 2. Roll out between sheets of parchment paper, chill
- Roll out the dough between two pieces of parchment paper to about 1/8″ thick. Chill for an hour.
step 3. Cut out the cookies
- Cut out the cookies using 2″ cookie cutter.

step 4. Bake
- Bake the cookies for 10 minutes. Let them cool right on the pan.

step 5. Dip in mint flavored chocolate
- Dip each cooled cookie in melted chocolate and set on parchment paper to harden. This is the step that turns a plain cookie into a Thin Mint!
- Dipping technique:
- drop the cookie top down into the chocolate.
- Use a fork to flip it over.
- Lift the cookie with the fork and tap against the side of the bowl to allow the excess chocolate to drip off.
- Tip the fork to slide the cookie off and onto a lined surface to harden.


Tips for this Thin Mints recipe
Rolling the dough between 2 large pieces of parchment paper prevents sticking and is less messy. You can roll it out on a lightly floured surface if you prefer.
Roll the dough to 1/8″ for traditional crispy thin mints. But you can cut your cookies a little thicker if you prefer. I enjoyed them at 1/4″.
Let the cookies cool on the pan. They will firm up as they cool.
You can make the dough ahead of time. Roll, chill, and cut the cookies. Then wrap and refrigerate until ready to bake.
Use your favorite top quality chocolate for truly gourmet Thin Mints. Official Girl Scout cookies are made with cocoa powder only (no chocolate) in the cookie and coating. When you use real melted chocolate you take a big step up in quality and flavor, and it’s part of what makes your homemade Thin Mints recipe so fabulous.
Don’t forget to add the oil to the chocolate coating whether you use baking chocolate, chocolate chips, or chocolate melting wafers. It helps to prevent ‘seizing’ of the chocolate when you add the mint extract.

Homemade Thin Mints questions?
Is this Thin Mints recipe hard to make?
- These cookies are easy to moderate in difficulty. The recipe involves common ingredients and straightforward steps. The required skills are rolling out cookie dough, melting chocolate, and dipping cookies in the chocolate coating.
How many cookies does this recipe make?
- About 3 dozen cookies, depending on how thin you roll the dough and the size of your cookie cutter. Mine is 2″.
Can I use a different type of chocolate for the coating in this Thin Mints recipe?
- Yes, you can experiment with various chocolate types (semi-sweet, milk, even white) for the coating. The flavor profile will change slightly depending on your choice.
Can I use chocolate chips for the coating?
- You could but I prefer bar chocolate or melting wafers. Chocolate chips have a thicker consistency when melted, which can make it harder to dip the cookies.
Can I make these gluten free?
- Yes, substitute a good quality gf baking mix for the flour and corn starch.
Can I make these without the mint?
- Go for it! You can make a classic chocolate covered cookie without the mint.
My chocolate coating is seizing (clumping). Why?
- Chocolate can seize up when you add flavorings or extracts which contain water or alcohol to it. I add oil to the melting chocolate which helps prevent this, so don’t leave it out. I use McCormick Peppermint Extract and have no issues with seizing. Peppermint oil can also be used, sparingly, and it does not cause chocolate to seize.
Storing and freezing homemade Thin Mints
The cookies can be stored at room temperature or refrigerated, and they’ll last about 10 days or so.
As you probably already know, Thin Mints freeze beautifully, and will last up to 3 months in the freezer. Separate layers of cookies with parchment paper to prevent sticking.
As you may also already know, these cookies taste amazing straight from the freezer ~ no need to thaw! Yum.

This Thin Mints recipe is the perfect copycat
The perfect copycat recipe? It mimics everything wonderful about the original, and sometimes goes a step further to improve it! In this case the homemade Thin Mints are made with higher quality ingredients than the ones that come out of a commercial bakery, so it’s a win win. The chocolate coating, in particular, is so much more satisfying
I think I just earned my cooking badge 🙂
MORE CLASSIC COOKIE RECIPES

Thin Mint Cookie Recipe
Video
Equipment
- baking sheets
- parchment paper
- 2 inch cookie cutter
Ingredients
for the cookies
- 1 cup unsalted butter at room temperature
- 1 cup sugar
- 1 Tbsp vanilla extract
- 1/2 tsp salt
- 3/4 cup Dutch process unsweetened cocoa powder
- 1 large egg
- 2 cups all-purpose flour ~ minus 2 tablespoons!
- 2 Tbsp corn starch
For the coating:
- 20 ounces dark or semi sweet chocolate bars, or melting wafers
- 2 tsp vegetable or coconut oil
- 1 tsp pure peppermint extract or oil, I used McCormick's Pure Peppermint Extract, you can also use peppermint oil, but use less of it, it's very strong.
Instructions
- Cream the soft butter, sugar, vanilla and salt together. Add in the cocoa powder and mix until the cocoa powder is integrated and the batter resembles a thick frosting.
- Beat in the egg, scraping down the sides of the bowl.
- Whisk the flour and cornstarch together and add to the bowl, mixing on low just until everything is well combined, but don't over-mix.
- Divide the dough into 2 halves and flatten into disks. Roll out each disk between two large pieces of parchment paper. Chill the dough for 1 hour.
- Set the oven to 350F.
- Cut the dough into rounds with a 2" cookie cutter.
- Place cookies on a baking sheet, an inch apart, and bake for 10 minutes. I like to bake one tray at a time for more even baking. Let the cookies cool on the pans.
- Make the peppermint coating. I do this in 2 batches, one for the first half of cookies, and the second when needed for the rest. Chop half of the bar chocolate into very small, thin pieces. Place in a glass measuring cup or similar container along with half the oil. Microwave for 60 seconds, then stir until completely melted. You can put it back in the microwave for 15 second bursts if necessary to get all the chocolate melted. Stir in the peppermint extract.
- Gently drop the cooled cookies, one at a time, into the coating. Drop face side down, then use a fork to flip the cookie to coat the bottom. Lift the cookie with your fork and let the excess chocolate drip off. Set the cookie down on parchment paper to harden. Repeat for the rest of the cookies, making a new batch of chocolate coating when needed.
- The cookies will set up in 30 minutes to an hour. They can be kept at room temperature for a week, refrigerated, or frozen for longer storage.
Notes
- Be sure that your butter is truly at room temperature before you start. If your butter is cool the dough will not come together well.
- Use the ‘fluff and scoop’ method to measure out your flour. That means fluff up the flour in the canister or bag to loosen it BEFORE you scoop or spoon out your measurement. Level the top of the measuring cup gently with the back of a knife to get the most accurate measurement.
Nutrition


Hi Sue, a quick question: when the chocolate dipping begins, I understand dipping in two parts. Your directions appear to say put (all) the peppermint oil in the first half batch; I think you mean to put in half the amount in each batch of dipping chocolate. Am I correct? Making your cookies right now!
Yes, you’re going to split the peppermint extract if you split the chocolate. Have fun!
This recipe seems delicious. I’ll try it soon!
Hard to take recipe seriously when weight of ingredients not given.
The weight of ingredients is given Cheryl, there’s a toggle button right opposite the ingredients list, just switch to metric.
I’m excited to try these as thin mints are a favorite in our household, but I have a question. I always weigh my flour… so much easier to get the right amount, and it makes a big difference in some recipes. But your metric measurement of flour says 220 grams – minus 2 tablespoons. So since AP flour is generally 120 grams per cup, do I go with 220 grams total (and assume that’s already reduced by the two tablespoons of flour)? Or would I use less? Please let me know if you can. Thanks!
Go with the 220 grams, the metric conversion is automatic and so the – 2 tablespoons language didn’t get removed.
These cookies are yummy on their own, once you turn them in to thin mints, you have to hide them from yourself!! They are sooooooo yummy! Great recipe, easy and delicious!