
A classic pear tart recipe with a simple almond-scented frangipane filling is the perfect showcase for gorgeous Bosc pears. This easy fall dessert is so quick to make!

WANT TO SAVE THIS RECIPE?
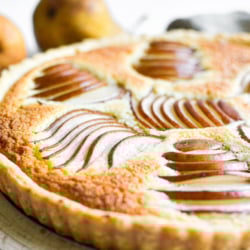
the flavors in this pear tart are simple but stunning
This classic French-inspired tart is simply perfect.
- A buttery pie crust is the perfect foundation (am I the only one who literally would just eat a good, flaky pie crust on its own?)
- Next we have a soft, famously fragrant almond frangipane filling. (Again, just hand me a spoon, this stuff is epic.)
- And finally, ripe pears bring a subtle sweetness for the perfect finishing touch.
If you have any kind of special occasion coming up this fall, I highly recommend this dessert, it will hit the spot without being complicated at all to make, promise!

why Bosc pears?
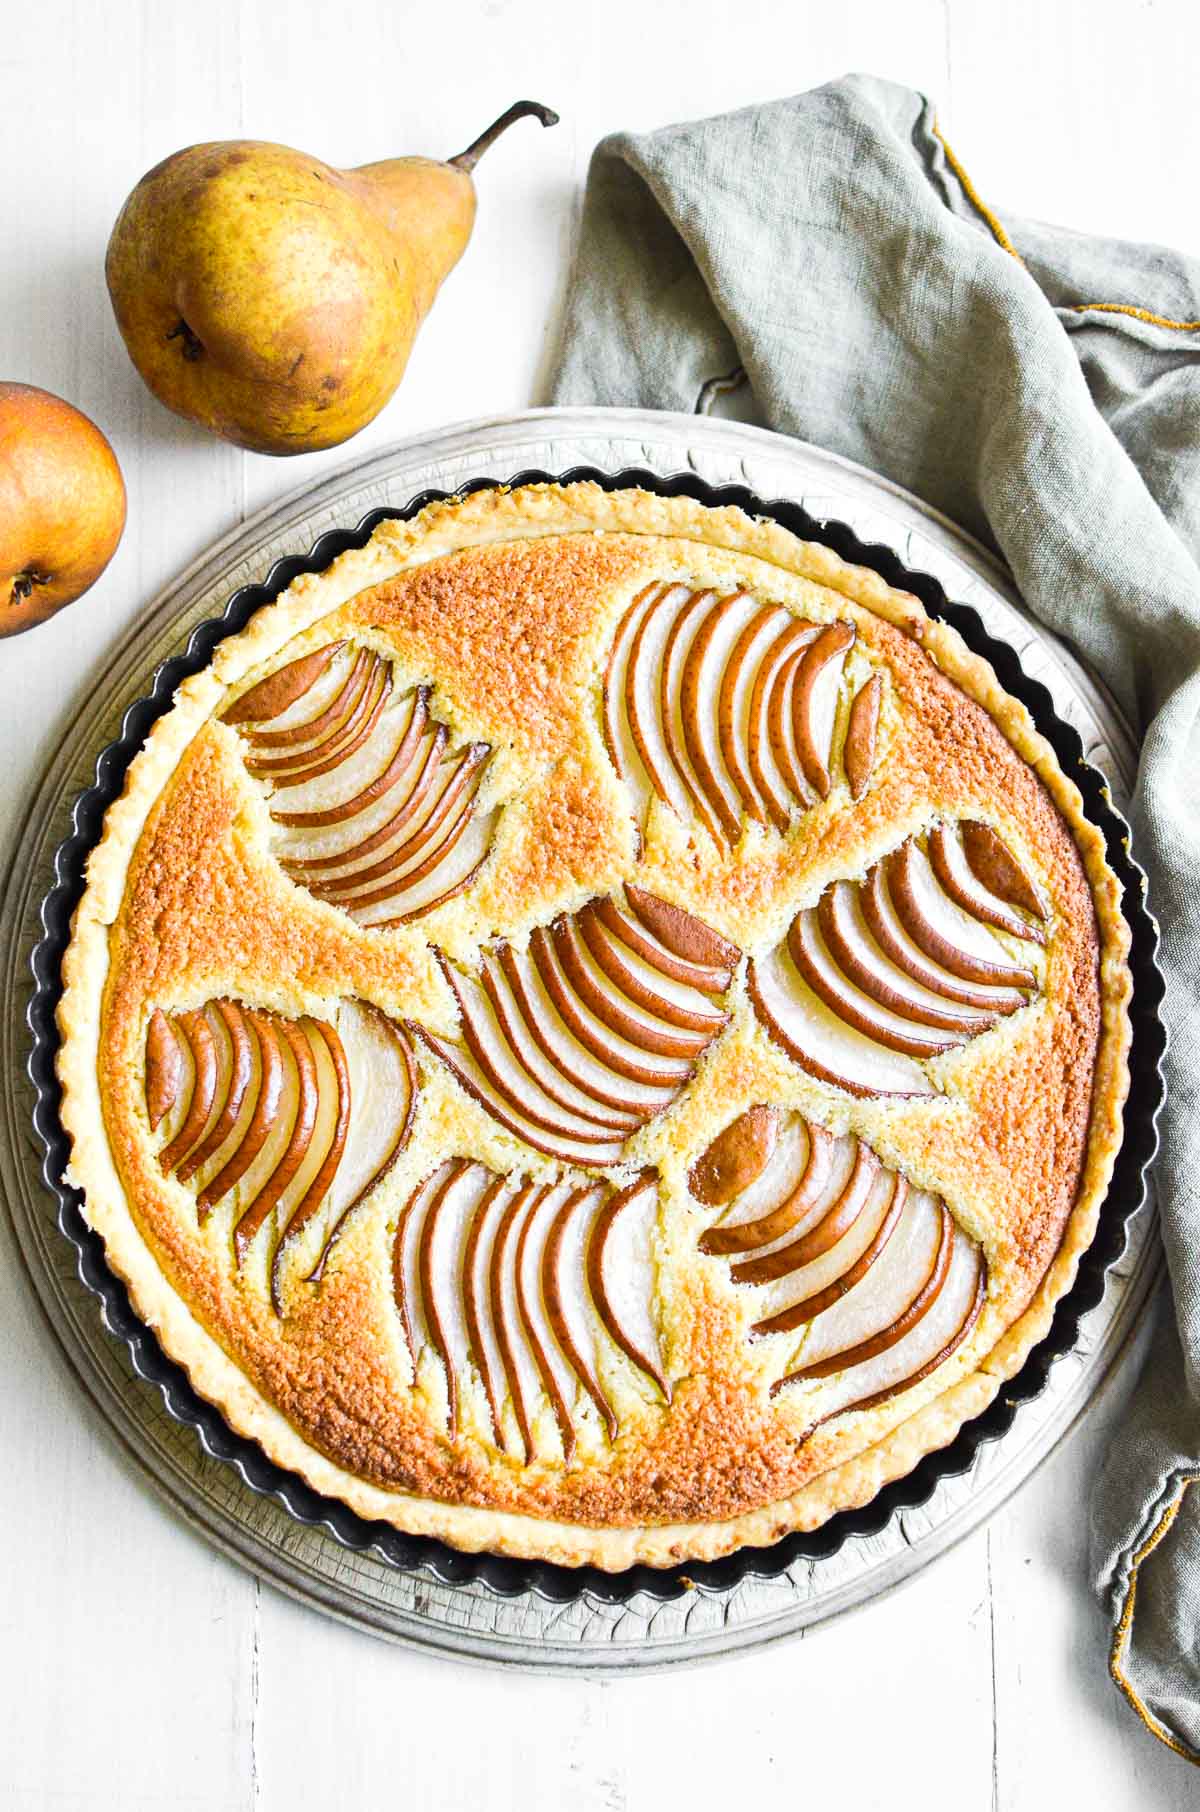
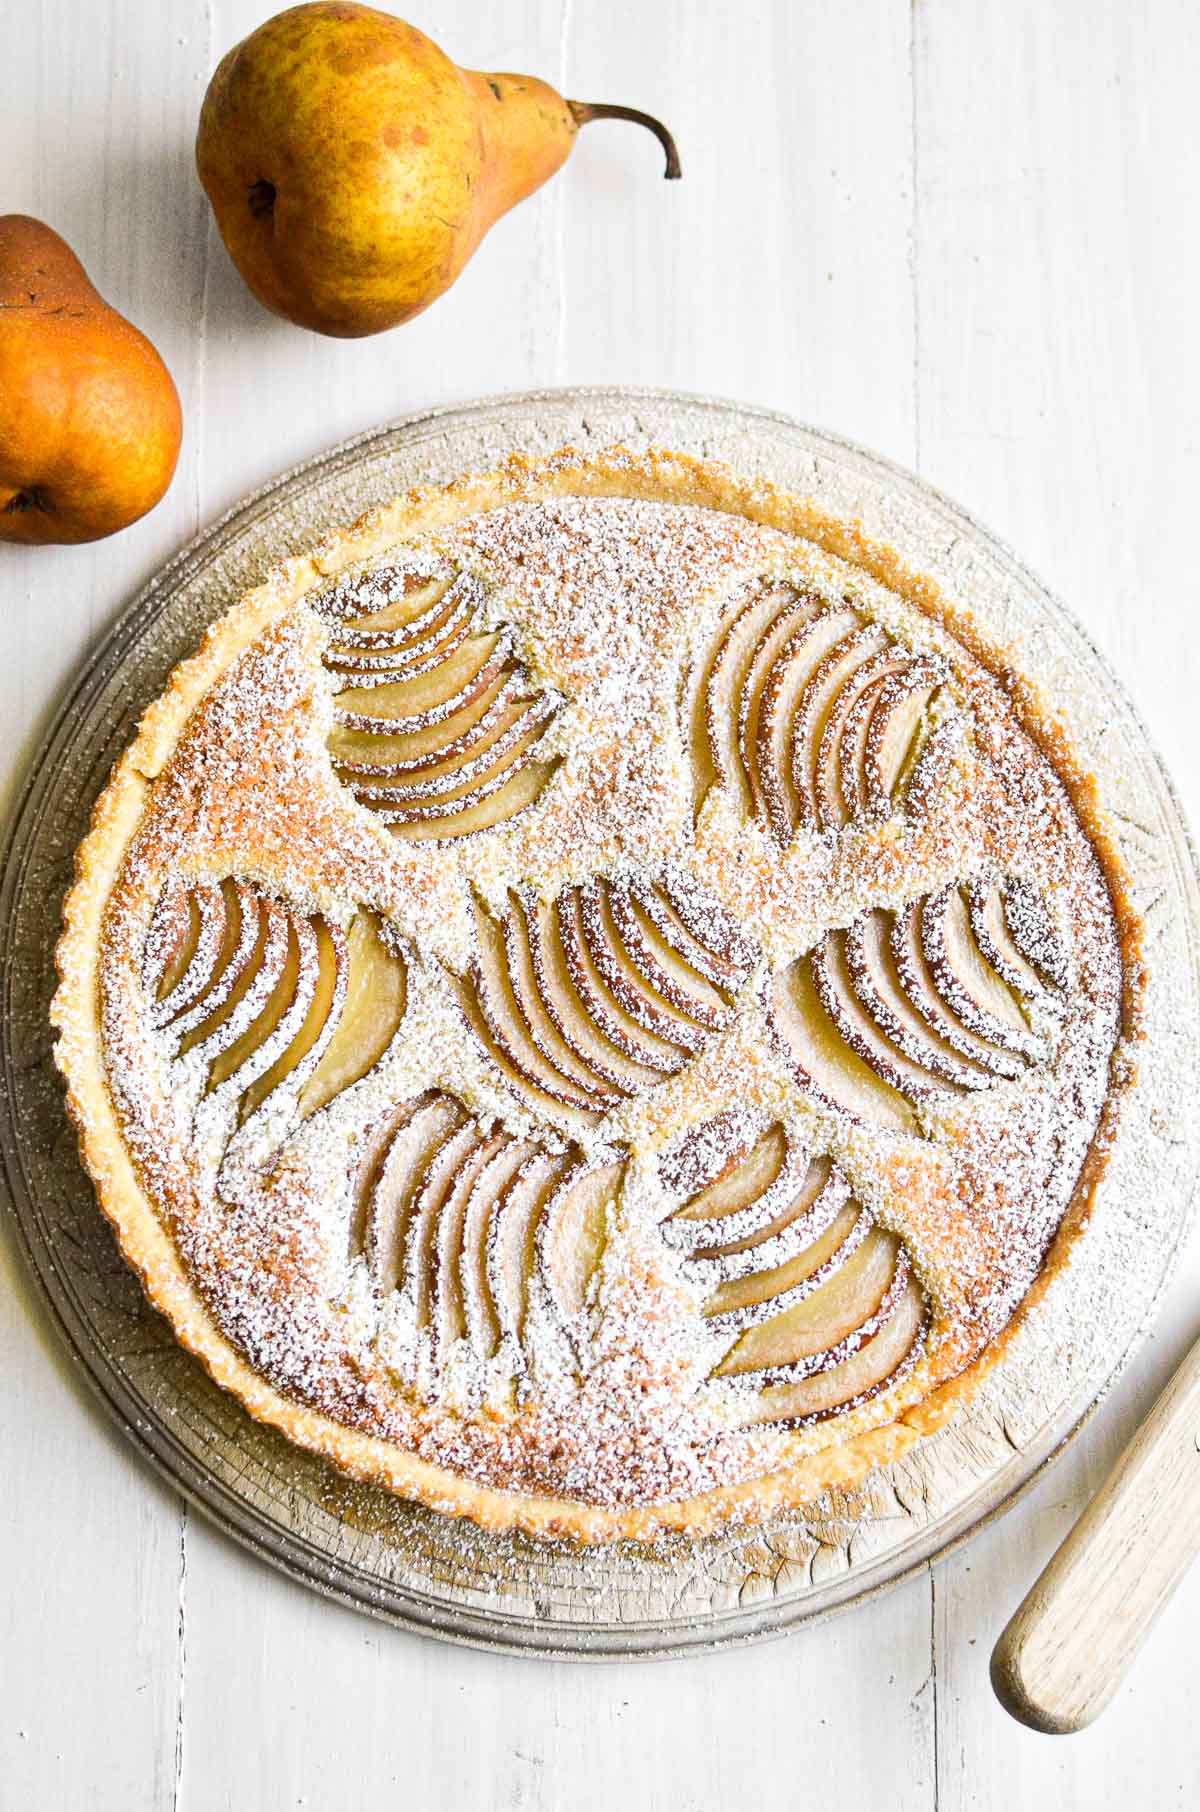
Boscs are the bronze colored pears with the elegant long necks.
They have the unique quality of being most flavorful early in the ripening process, so you don’t have to wait for them to fully soften to enjoy them, or cook with them.
They’re a great choice for baking because they will keep their shape nicely.
The flavor of Bosc pears has warm spice notes, perfect for a fall dessert!

can you use a different type of pear?
Absolutely! Use whatever you like, but avoid any fruit that is overly ripe.
what is frangipane and why do you want it?
- Frangipane is a sweet pastry filling made with ground almonds or almond flour, sugar, butter, eggs, and almond extract. If you’ve ever had an almond croissant, you’ll recognize the soft, sweet flavor, it’s one of my personal favorites.
- It can be used in all sorts of ways, including as a simple base layer for fruit tarts and galettes.
- Did you know you can make frangipane with other nuts, too? My pecan frangipane pie is one of my all time favorite recipes, and I’ve been meaning to try a frangipane with walnuts or hazelnuts forever!
- You don’t need any special equipment if you make your frangipane using almond flour, but you can also grind your own almonds in a food processor (just make sure to use blanched almonds).
3 easy steps to a stunning pear tart
Do you look at a tart like this and think it’s too complicated to make? If so, allow me to convince you otherwise! There are basically 3 components to this tart, and they are all really user friendly, even for a beginner pastry chef.
- a basic pie crust can be made incredibly easily in any food processor. My recipe makes 2 crusts (this is because a single pie crust wouldn’t fit well in a standard food processor bowl), and the other one can be frozen for later use. Not up for it? A store-bought frozen pie crust will work perfectly too, no need to blind bake.
- the almond frangipane filling has just a few very basic ingredients, just whip it up with electric beaters or in a stand mixer, easy peasy.
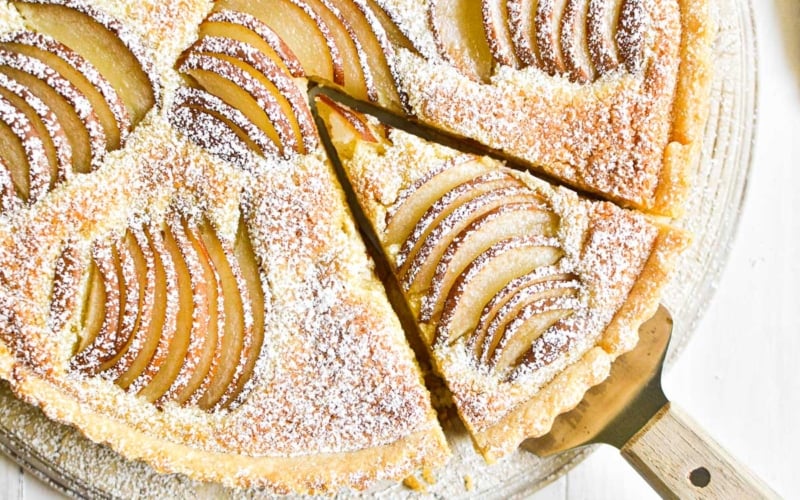
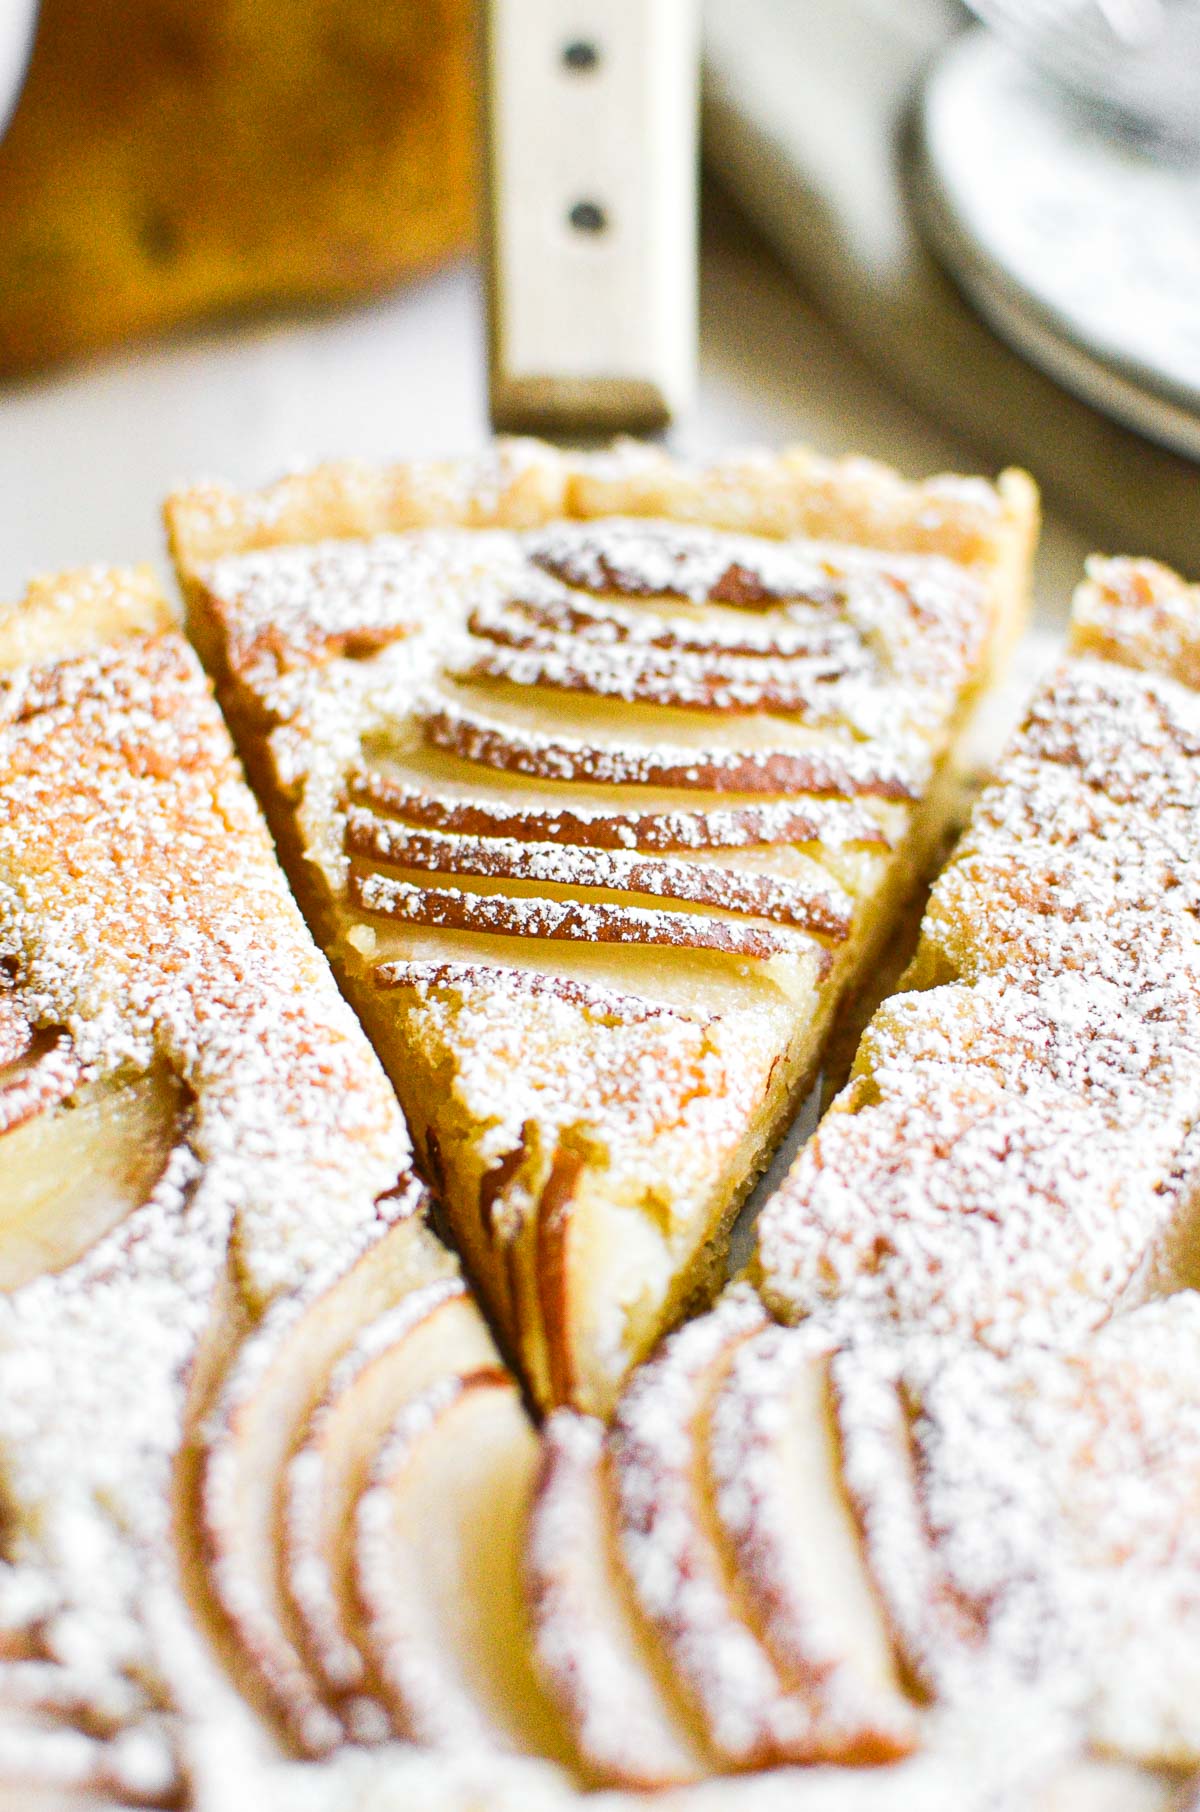
- finally, slice up a couple of pears to nestle into the filling. You can arrange them any way you like. I sliced my pears into slices about 1/4 inch thick, and took groups of about 6-9 slices, fanned them out slightly, and gently pressed them into the frangipane before baking.
tips and tricks for pear tart success
- NO BLIND BAKING NECESSARY! Some tarts require blind baking the pie crust before filling it and baking again, so that the pie crust doesn’t end up undercooked and soggy on the bottom. The baking temp and time here mean that this is unnecessary, and I still ended up with a golden, flaky crust, even on the bottom!
- FIRM PEARS ARE BEST! Most pears you buy at the store are underripe, and will ripen after a few days of sitting at room temperature. I used Bosc pears I purchased from the store a day or two before baking this tart, so they were still pretty firm to the touch. Baking softened them up perfectly, so no need to plan days ahead to make sure your pears are perfectly ripe before making this recipe.
- TENT WITH FOIL TO PREVENT OVER BROWNING! As it bakes, the top of this tart turns a nice golden brown, but I found it necessary to tent the tart with a piece of aluminum foil for last 10 minutes or so of baking to avoid it getting too dark. So, keep an eye on it, and keep a piece of foil handy.
- TRY A GLAZE TOPPING! The powdered sugar topping is totally optional, but if you want another way to give this tart a polished look, try brushing a little bit of warmed up honey or a simple vanilla syrup over the tart when it’s out of the oven. This will give it a nice sheen and a little bit of extra sweetness.
- MAKE THE CRUST AHEAD! I’d definitely make this tart the day you’re planning to serve it, but the pie crust can be made in advance and kept in the fridge for a couple of days, or in the freezer for longer storage. Just thaw it in the fridge before rolling it out.

more seaonsal pear recipes
- Fresh Ginger and Pear Cake
- Pear Muffins with Hazelnut Streusel
- Pear Salad with Creamy Walnut Dressing
- Easy Pear Crisp
- Spiced Vanilla Pear Oatmeal
Almond Pear Tart
Equipment
- 10-inch tart pan with reoveable bottom
Ingredients
pie crust (makes 2)
- 2 1/2 cups all purpose flour
- 1 cup unsalted butter, cold, cut into pieces
- 1 tsp salt
- 1 tsp sugar
- 1/4 cup ice water
for the tart filling
- 1/2 cup unsalted butter, room temperature
- 1/2 cup granulated sugar
- 1/4 tsp salt
- 1 large egg
- 1 tsp almond extract
- 1 cup almond flour
- 1 Tbsp all purpose flour
- 2 medium pears, sliced thinly*
- 2 Tbsp powdered sugar for dusting on top of the finished tart, optional
Instructions
- To make the pie crusts, add the flour, butter, salt, and sugar to the bowl of a food process and pulse until there are no large chunks of butter left (small pieces are fine)
- Slowly add in the ice water, and continue to pulse until the dough comes together into a single clump. Remove from the food processor, divide in half, and refrigerate until ready to use. (You'll only need 1/2 of the dough for this recipe, so I like to wrap the second one tightly in plastic wrap and freeze it to use later. It freezes perfectly!)
- Preheat oven to 375F. Roll out your tart dough into a circle about 1/4 inch thick, and fit it into your 10-inch tart pan with removable bottom. Set the crust in the refrigerator while you make the filling.
- In the bowl of a stand mixer with the paddle attachment (or with electric beaters), cream together the butter and sugar until light and fluffy. Add the salt, egg, and almond extract and mix well to combine.
- Finally add the almond flour and the all purpose flour and mix until combined.
- Spread the almond mixture evenly into the bottom of your pie shell. It helps to dollop the filling evenly across the surface of the pie crust before spreading it out.
- Add the sliced pears on top of the almond filling, arranging them any way you like. I took groups of 6-9 thin slices, fanned them out slightly, and pressed them gently into the filling.
- Bake for about 35 minutes. The filling should be puffed up and golden brown. I tented mine with a piece of aluminum foil for the last 10 minutes of baking to keep it from getting too brown on top.
- Remove from the oven and allow to cool before dusting with powdered sugar.
Notes
Nutrition


I want to make this for an early morning ladies coffee, don’t think I’ll have time in the morning to make it, can I make the night before?
Yes, I would leave it at room temp loosely covered (fruit cakes get moister as they sit.) Wait to dust with powdered sugar until serving.
Thank you!
My house smells so good! I doubled the recipe so I could make two tarts. I baked them for 35+ minutes, but the filling is still wet. Will it set while it cools? Excited to eat this with a dollop of whipped cream! Thanks for sharing!
It sounds like it didn’t get baked quite enough Lara, next time let it go a little longer.
Hit of the foodie’s party! Even edged out a great home made German Chocolate Cake.
Yay! Thanks for the review 🙂
Perhaps making an almond crust would be tasty as well.
Good idea!
Great recipe.
Just two additions – I found that toasted sliced almonds on top, after it comes out of the oven, makes a really nice addition.
Also, found that the powdered sugar melts and becomes invisible after a little while, so it’s best to wait to dust it until just before serving.
Thanks so much Rich!
The photo gives the appearance that more than two pears were used. Was there a special way you cut the pears to give that effect?
Never mind. Two pears were more than enough. I underestimated how many slices I would be able to get out of two pears. My pears were not that flavorful, so I prepared a glaze with sugar, butter, and pear liqueur and glazed the pears 10 minutes before baking completion. Also, a melon baller will make for easy removal of the center of the pear with the seeds.
Sorry I missed your original question Ana, but I’m glad it worked out so well for you!
I’ve always blind baked tart shells in the past – does this still come out crispy on the bottom without blind baking?
If you prefer to blind bake your crusts you can do that here. It comes out baked through but not super crispy the way I do it.