
“Why did I ever think making English Muffins was hard? Yours came out great. Toasted, with melted butter…Mmm.” ~Kathy

WANT TO SAVE THIS RECIPE?
homemade English muffins easy enough for beginning bread bakers
Whenever I make homemade English muffins I wonder why I don’t do it more often. It’s the holy grail of breads as far as I’m concerned and perfect for beginning bread bakers. The dough is easy to mix together, and they cook right on the stove. Then there’s a fun factor in watching them transform from blobs of dough into that unmistakable English muffin shape. From start to finish you can be toasting your very own English muffins in a matter of a couple of hours. Get the butter and jam ready, this happens fast!
where did English muffins originate?
It’s thought that English muffins were first made in Wales, but it was an Englishman, Samuel B Thomas, who first made them in New York City in the 1880s. They were originally called ‘toaster crumpets‘. The unique feature of English muffins is that they’re meant to be sliced, or ‘fork split’ horizontally, and toasted.

ingredients you’ll need for homemade English muffins
- bread flour ~ this recipe makes standard English muffins with white bread flour, but regular all purpose flour will work just fine. Once you master this you can vary it with different flour blends. You might try white whole wheat flour, or half and half white plus whole wheat flour combination.
- instant yeast ~ instant yeast works quickly and doesn’t have to be proofed before using.
- milk ~ tenderizes the dough and helps it rise.
- egg ~ lightens and tenderizes the dough.
- sugar ~ helps that yeast rise even faster.
- salt ~ essential for flavor.
- semolina (a coarse Italian wheat flour) or corn meal for dusting the muffins and surfaces, it gives English muffins that characteristic sandy surface.

how to make easy English muffins
I like this English Muffin recipe because everything gets dumped all at once in to the bowl of the stand mixer and the dough comes together in 5 minutes. You don’t even have to fiddle with proofing the yeast, or anything else, for that matter. See step by step photos in the recipe card, below.
- Put all the ingredients except for the semolina into a stand mixer fitted with the paddle attachment (not the dough hook.)
- Blend, first on low to mix everything together, then turn up to medium for about 5 minutes. Scrape down the bowl a few times if necessary. The dough should be sticky but elastic.
- Scrape the dough down into a rough ball and cover with plastic wrap. Let rise in a warm place for about 1-2 hours until risen and puffy.
- Deflate the dough and divide into 16 pieces. Roll them round and then pat into small disks.
- Let rest 20 minutes.
- Cook the muffins on low heat in a griddle or cast iron skillet until browned on each side and done through.

you’ll love this easy recipe
I was positively giddy watching these bake. Initially they puff up, and when you flip them they settle into that English muffin shape. I’ve said it before, but there is something so satisfying about making your own version of something that you’ve bought for years and always just assumed came out of a package.

homemade English muffin tips and FAQS
English muffins are known for their distinctive texture, which includes lots of small air pockets, also known as “nooks and crannies.” The reason English muffins have these nooks and crannies is due to their unique cooking process on the stovetop, where the high heat heat causes the moisture inside the dough to evaporate and create steam. This steam causes the muffins to rise and create air pockets throughout the dough.
Why didn’t my dough rise?
Dough rises faster in warmer temperatures. If your kitchen is cold your dough might not rise in the 1-2 hours allowed. Look for a warmer place to set your bowl or invest in a proofing box, which I love. I plug it in, set it to the temperature I want, and set my dough inside. It always rises beautifully and the box folds flat when not in use. Also be sure to check the dates on your yeast packets and make sure your ingredients were at the recommended temperatures in the recipe.
Your heat was too high. I cook my muffins on low heat. The bottoms don’t take on color until the latter part of cooking. You need to be patient and cook low and slow so the insides can cook through before the outside gets too brown. It takes up to 15 minutes on each side. If your semolina is getting dark brown or burned, your heat is too high. Wipe out the pan and set your heat a little lower.
No, they won’t get nice and brown or take on the right shape in the oven. You can finish cooking them in the oven, though, if necessary to get the inside thoroughly done.
All cooks need an instant read thermometer in the kitchen, so get one asap. If you don’t have one, cook the muffins for the full time, and then give their sides a squish with your fingers…if they feel very soft you may want to pop them in a 350F oven for a few minutes to cook through.
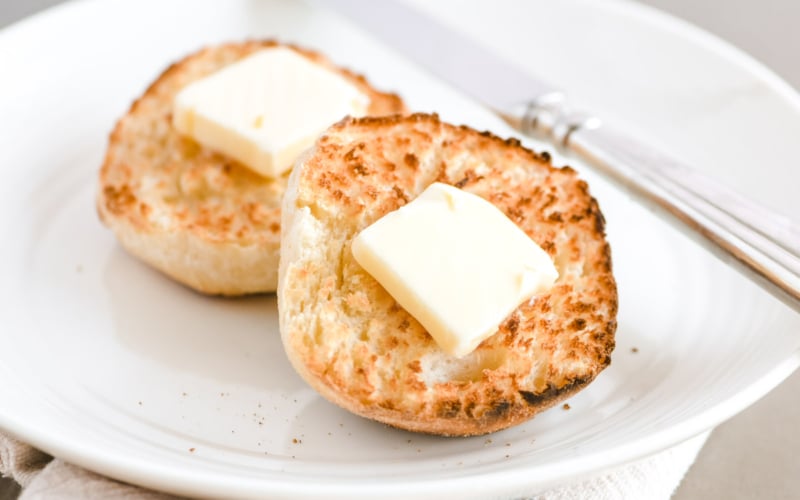
Take the tines of a fork and pierce the soft sides of the muffin all the way around the perimeter. Then gently pry the muffin apart into 2 halves. This will reveal all those famous nooks and crannies! Alternatively you can use a serrated bread knife to slice the muffins, but I highly recommending fork splitting them.
They’ll last for up to a week. Keep them in a zip lock baggie on the counter, or in the fridge. Since you are going to be toasting them, they will still be good even after several days.
Yes, they freeze beautifully. Wrap them well and use within 3 months.
Yes, you can make the dough up to step 3, then cover well and refrigerate overnight. Bring to room temperature before proceeding with the recipe.

more breakfast breads and muffins
- Muesli Toasting Bread
- Cinnamon Raisin English Muffins
- Paleo Fruit and Nut Breakfast Bread
- Darina Allen’s Irish Soda Scones
- Maple Oat Nut Scones (Starbucks Copy Cat)
- Perfect Blueberry Muffins

How to Make Easy English Muffins
Equipment
- a stand mixer is helpful
- an instant read thermometer is also a help
Ingredients
- 1 3/4 cups lukewarm milk, about 110F
- 3 tablespoons softened butter
- 1 1/2 teaspoons salt, to taste
- 2 tablespoons granulated sugar
- 1 large egg at room temperature, lightly beaten
- 4 1/2 cups bread flour
- 2 teaspoons instant yeast (one packet)
- semolina or corn meal, for sprinkling on the griddle or pan
Instructions
- Put everything except the semolina into the bowl of a stand mixer fitted with the paddle attachment (not the bread hook.) Alternatively, if you have a bread machine you can set it to the dough cycle.
- Mix the dough on medium speed for about 5 minutes, The dough should come away from the sides of the bowl and be smooth and quite elastic. I had to scrape the sides of my bowl a couple of times.

- Scrape the dough down into a rough ball and cover with plastic wrap. Let rise in a warm place for about 2 hours until risen and puffy.

- After the rise, gently deflate the dough. This dough will be soft and sticky. Turn it out onto a surface that has been dusted with the semolina, or corn meal, and form it into 16 pieces. (First cut the dough in half, then cut each half in half, and again and again until you have 16 (more or less) equal blobs.

- Form the pieces into rounds, and then lightly pat them into disks about 3 inches in diameter. Make sure they are dusted on both sides with the semolina. Cover loosely with plastic and let rest for about 20 minutes. They will puff gently.

- Sprinkle your griddle or skillet with a little semolina or corn meal. Cook the muffins on a low to medium low heat for about 15 minutes on each side, until they are golden browned and done. They will puff up initially, and when you flip them you'll see them take on the traditional English muffin shape.

- You can test for doneness with an instant read thermometer…the inside should register 200 degrees F when they are completely cooked through. If they are very brown before getting thoroughly done on the inside, transfer them to a 350F oven to finish cooking for 5-10 minutes. Note: your muffins should not be getting brown right away, if they do, your heat is too high.

- Be sure to use a fork to split the muffins before toasting to bring out that famous English muffin texture.

Notes
- If you have an electric griddle, set it to 300F. Otherwise, use low to moderate heat on the stove. A griddle pan, or heavy bottomed pan, like cast iron, works well to modulate the heat. The muffins have to cook through, so you don’t want them to get too brown too quickly.
- Work in batches so you don’t crowd your pan.
Nutrition


These English muffins look fantastic! I need to try these right away.
I love how easy this is to make! My kids really loved it!
I love English Muffins but this was the first time that I tried making them myself. I’m so glad I did. They were awesome, and easier to make than I expected. Thanks for sharing this recipe.
Glad they worked out for you Michele 🙂
We love English muffins with breakfast, so I was so glad to find this recipe! I will never buy store bought again!
Found my batter too moist so added more flour & kneaded it in before rising. Although after they finished cooking on stove, and 180F reached, they didn’t seem done inside after cooling a bit, so put them in oven for 10 min. Felt more salt needed but perhaps it was I only added 1 tbsp.sugar. Did anyone else have similar problems?
I hate to be the bearer of bad news, but short-rising breads have the least possible flavor. I made English muffins every 3 days for about 4 months and there was a sharp difference in flavor between no-starter and starter doughs. Short-rising English muffins taste floury to me, but my husband doesn’t seem to notice the difference.
I mixed 1/2c water, 100g flour, and 1/2t yeast (subtracted out of your total water/flour/yeast) together into a wet dough at about 3pm, let it ferment until about 10pm when I dump the remaining ingredients into the bowl, kneed it, and let it rise overnight (a lot of people put it in the fridge, but the counter is fine if your kitchen is on the cool side). In the morning, continue as your normally would (shape, rise, etc.). I also do no sugar (yeast can eat flour), no egg.
Thanks for your input c. ~ this is definitely worth a try!
Can I use almond milk & lactose free butter in this ? I’m lactose intolerant
That should work fine Rachelle.
How long do they keep once cooked & how do you store them? 12 is a lot for one person
I would wrap them well and freeze them, Helene. They will last 6 months in the freezer.
Another great recipe! Thank you for sharing.
Would it be possible to use all purpose flour instead of bread flour since that’s all I have on hand?
You can certainly try Dee, but they won’t have quite the same texture.