
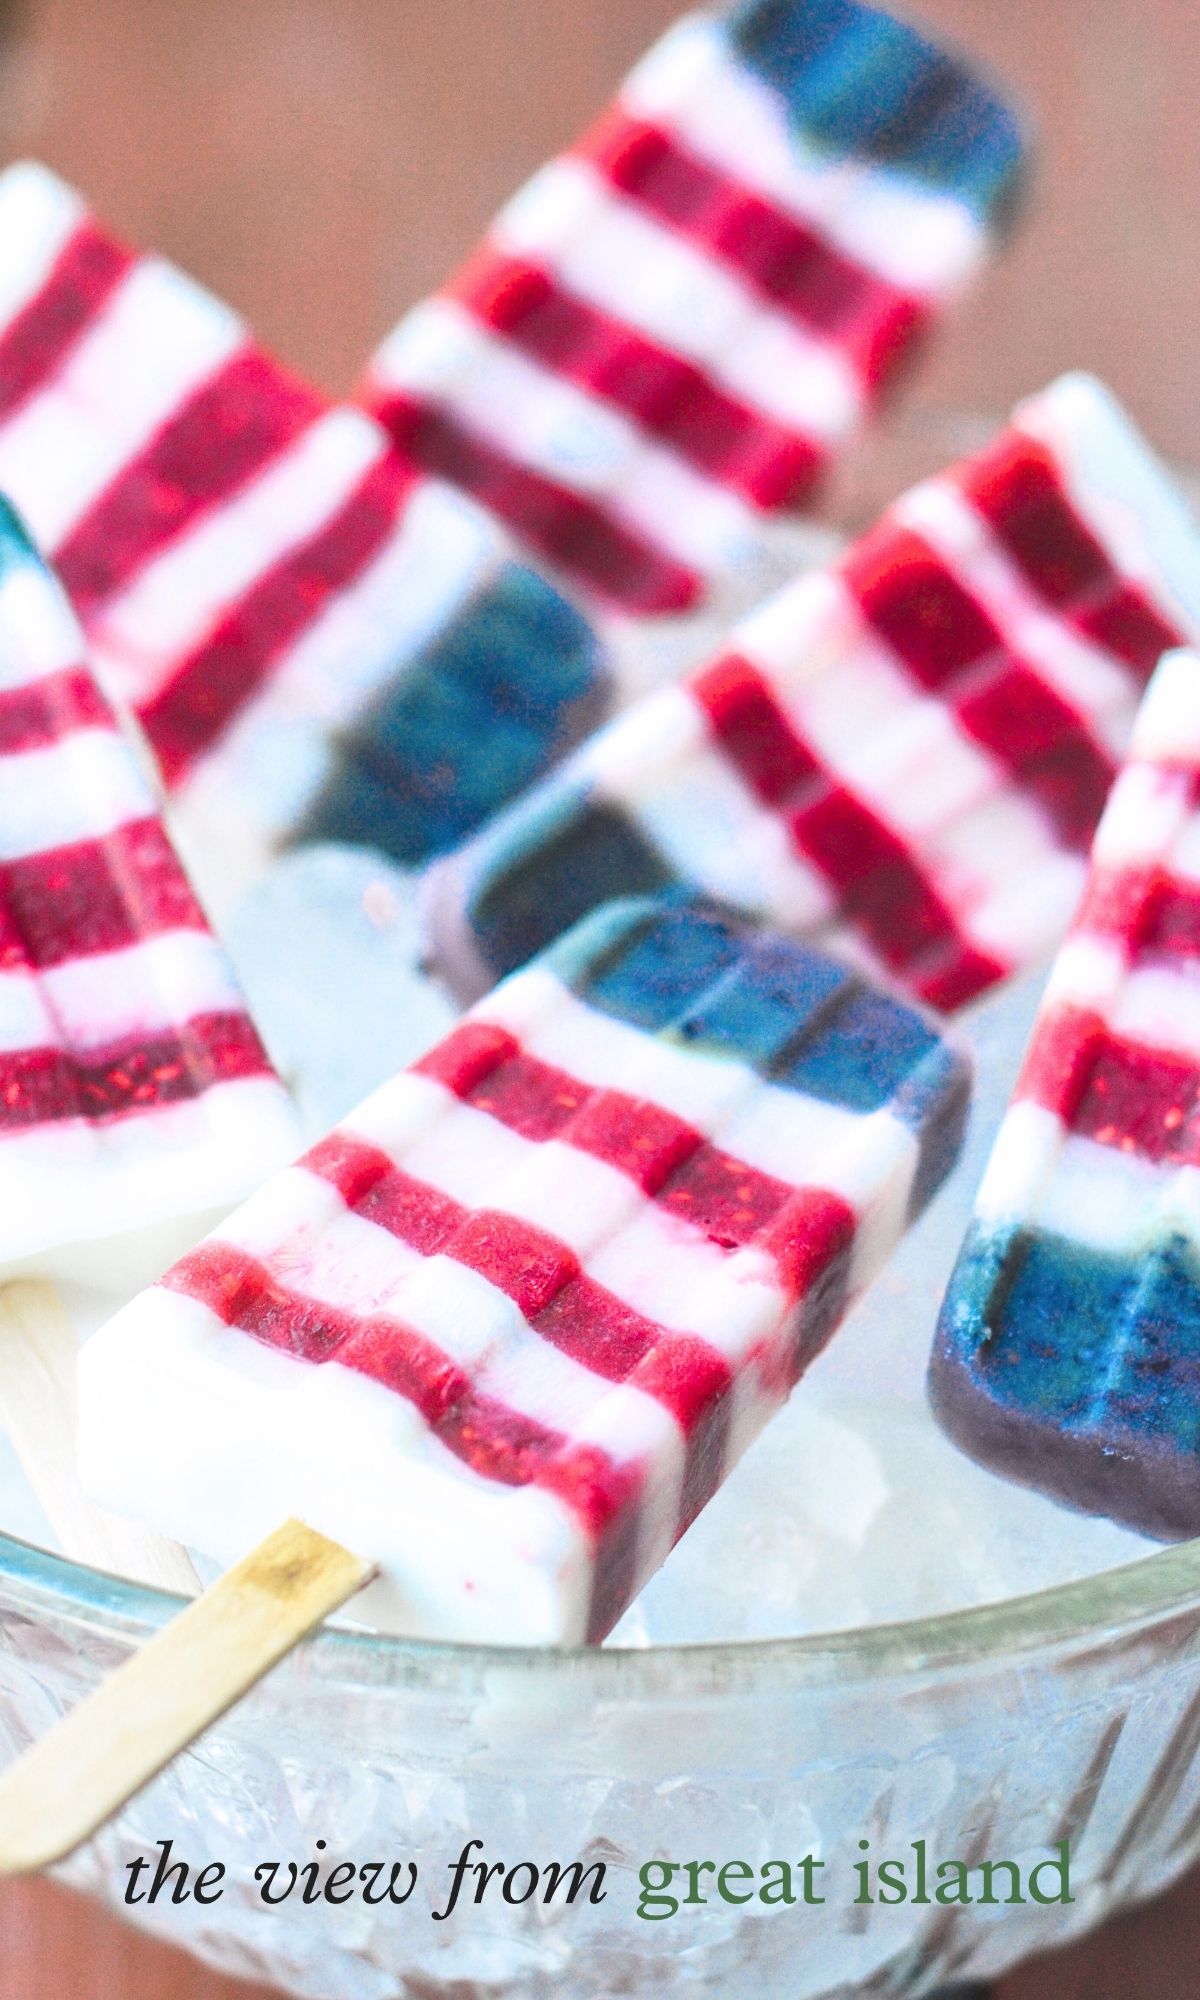
.Show your colors this summer with these healthy Red White and Blueberry Yogurt Popsicles. Kids of all ages love these berry-licious frozen treats, so layer up a batch this Memorial Day or 4th of July

WANT TO SAVE THIS RECIPE?
You don’t have to be a flag waver to flaunt a little Americana this season. These red white and blueberry yogurt popsicles are fun to make and super fun to serve!
There’s no food coloring or added sugar in these patriotic treats…
- just plump ripe blueberries
- raspberries (or strawberries)
- Greek yogurt for the creamy white stripes

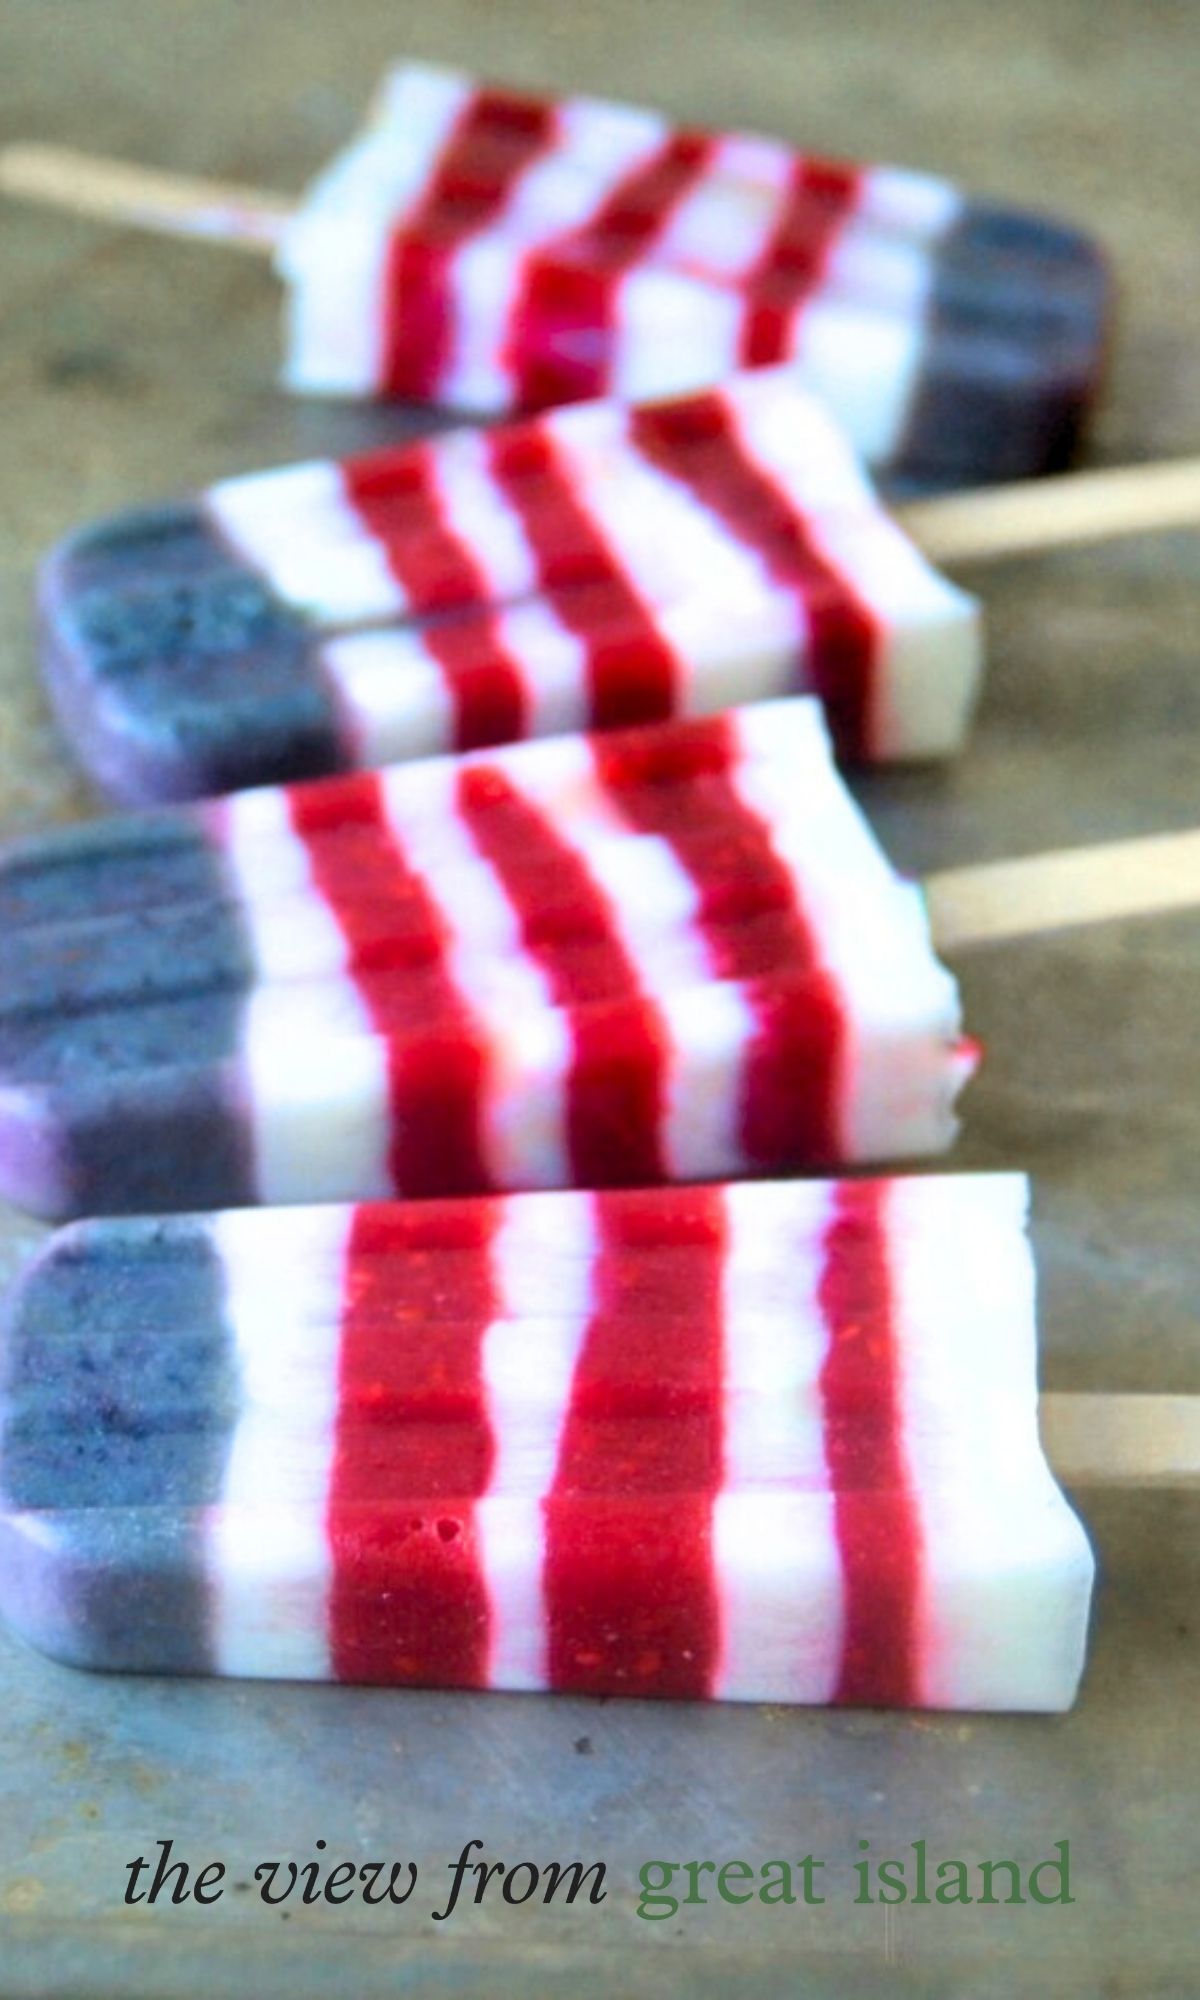
If you do a simple “red white and blue food” search on Pinterest, you’re going to see some day-glo treats out there. I’m all for national pride, but not with blue jello and red dye. My red white and blueberry yogurt popsicles are actually healthy, so you can feel good about showing your colors, and eating them too. I use fresh summer strawberries for the stripes, pure yogurt for the white, and blueberries for the patch of blue. Old Glory never tasted so good!
more healthy fruity popsicles for summer

You’ll need a popsicle mold for this project, as well as some sort of blender or food processor to make your berry purees. You can also use paper cups as molds in a pinch.
the popsicle mold I use
Lots of you have asked about what popsicle mold I use. I use one like this one because they are sturdy and I like the classic popsicle shape. I don’t use the plastic top that comes with it, though because it can get stuck when the sticks aren’t perfectly straight. A simple foil top works best, and I insert the popsicle sticks right through the foil. You can find wooden popsicle sticks here.

TIPS for making red white and blue striped popsicles
Yes, this is a little bit of a labor of love, but the 4th of July only comes around once each year!
- Be sure to thin your purees, and your yogurt so that you can more easily layer them into the mold. If they are too thick, you will have trouble doing this neatly.
- For the sharpest stripes, have everything very cold before layering, that way the layers won’t tend to bleed into each other as much.
- Be sure to freeze each layer completely before going on to the next.
- These pure fruit popsicles melt fast, so don’t take them out of the freezer until you’re ready to eat or serve them, they won’t last long in the hot sun.


Red White and Blueberry Popsicles
Equipment
- popsicle mold
- blender or food processor
Ingredients
- 1 cup raspberries, heaped
- 1 cup blueberries
- 1 cup vanilla flavored Greek yogurt
Instructions
- Using a small 4 cup food processor, or blender, puree the raspberries until smooth. Set aside.
- Do the same with the blueberries. (If your blueberries are super purple, add a little blue food coloring.)
- Put the yogurt and each of the berry purees in small measuring cups with spouts. The goal is to thin them just a bit so they are pourable. Use water for the yogurt and the raspberries, and, depending on the color of your blueberries, you can use water, or yogurt if you need to brighten up your ‘blue’. Keep these cups chilling in the refrigerator when you are not using them.
- To layer your pops, start by pouring a little of the blueberry in the bottom of each mold. The only tricky part to these popsicles is getting the layers in without too much spillage to mar your stripes. Use my photos as a rough guide for how much blue you want. Don’t get too fussy, it should look rustic!
- Put the mold in the freezer and freeze till firm, at least an hour, or more.
- Layer a little bit of yogurt into each mold for the next stripe. You will be able to see through the side of the mold to check your progress. At this point, cover the top of the mold with foil, and insert the popsicle sticks. Make sure to get the stick a little bit into the frozen layer so they will stand straight. Put back into the freezer until solid.
- Remove the foil at this stage, you won't need it since the stick is in and you need to layer. Next comes your raspberry stripe, and so on until the molds are filled. Make sure to freeze each stripe until solid before adding the next. Don't worry if the stripes are uneven, but do try to clean up any dribbles as you go. I used a popsicle stick to scrape down the insides of the mold after each stripe.
- Once filled and completely frozen solid, you can un-mold your pops. Fill the sink with hot water. Remove the foil, and immerse the mold just up to the lip, being careful not to let any water splash onto the top. Hold it for a few seconds, remove, and try to pull the pops out. If they don't slide out, immerse again for just a few seconds.
- I recommend keeping the popsicles in the mold until you are ready to serve, or, if you are working in batches, wrap each pop quickly in waxed paper or put into a baggie and put back in the freezer. I don’t recommend making these more than a day in advance.
Nutrition


YUM!!! Pinned! I’d love for you to share this at my Saturday Dishes Link Party this weekend! It’s a themed link up & this week’s theme is Memorial Day & Grilling! Feel free to share other posts that fit the theme as well if you have them! (: http://lifeisfantasmic.blogspot.com/
I’m glad you’re not over striped Popsicles yet, because I puffy heart love them! Especially these flag Popsicles! 🙂 So cute! Pinned!
Thanks Jocelyn!
I’m so impressed by your popsicle recipes. I was searching for ideas of what to make for our Memorial Day barbecue, and now I can stop looking. These will be on my weekend agenda, for sure. They would almost be too pretty to eat (almost!) if they didn’t sound so delicious.
These look amazing, and so festive! I’ve gotta get a mold for this summer!
Be sure to stop by next week for 7 days of popsicle inspiration!
These are the most beautiful popsicles I’ve ever seen! I’m sure they’re delicious too. Love the rich colors.
these look delicious!
These are absolutely gorgeous! And so simple with amazing ingredients. I’m pinning this for sure!
Thanks Lila!
how patriotic! they seem so easy to make too–very clever of you, sue!
I ordered popsicle molds right after you posted the first stripes. I didn’t make the stripes, but I have been making a pineapple-coconut blend that totally wiped out my Outshine bar habit …my bedtime snack. However, I think I need to do these red-white and blues – so much fun and perfect flavor combo! I’ve been thinking of adding some yogurt to my pineapple-coconut blend so am now inspired to do that also. Thanks!
That’s so funny because I just this second pulled pineapple pops out of my mold!
Just looking at those makes me happy! They scream summer! And thank you for the link and tips to the molds. I will be picking some up so I can make these with my kids!!