

How to make authentic clotted cream right on the stove, in your oven, or in the Instant Pot ~ perfect for tea time scones!

WANT TO SAVE THIS RECIPE?
Clotted Cream : The Basics
- Clotted cream is a thick creamy spread normally used on scones, originally made by farmers in Great Britain.
- It’s made from heavy cream that has been heated over a period of time until it thickens or ‘clots’ into a spreadable consistency with a unique cooked cream flavor and an extremely high fat content.
- Clotted cream is world famous for its unparalleled rich texture, and it’s an essential part of a classic British afternoon tea.
- Normally the only way to get clotted cream is to visit Great Britain, or to spend big $$ on a very small imported jar at your local gourmet market.
- I’ve come up with 3 different ways you can make this famously decadent spread in your own kitchen.

Clotted Cream FAQ’s
- What does clotted cream taste like?
Clotted cream has a very simple flavor profile, like an unsweetened heavy cream with a subtle ‘cooked’ flavor. It’s famous for it’s amazingly thick creamy texture, (or mouthfeel) which is unparalleled in the food world.
- What kind of cream do I need to make clotted cream?
The most common type of heavy (or whipping) cream you’ll find in stores is ultra-pasteurized, meaning it’s been heated to an extra high heat so it will stay fresher longer. The cream that works best for clotted cream is regular pasteurized cream, (not ultra pasteurized cream,) and that can be a little more difficult to find, but it is available. Try Whole Foods, Trader Joes, or a large supermarket with a wide selection. That being said, some readers have had success with the ultra pasteurized cream.
- What is clotted cream used for?
Clotted cream is used as a spread for scones, but you can also use it on biscuits and muffins, etc. It’s great for breakfast, and essential for an authentic English afternoon tea.
- How long will my clotted cream last in the fridge?
About 2 weeks.
Method 1: Instant Pot Clotted Cream (click here for the full recipe)

How the Instant Pot method works:
- This method takes advantages of the highly accurate settings on the Instant Pot to boil the cream and then keep it at just the right temperature to separate into whey and thick clotted cream.
- I use the 6 Qt Ultra model Instant Pot for this recipe.
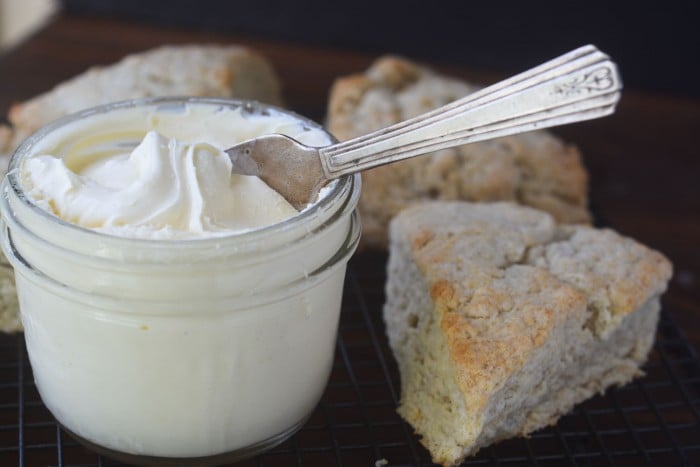
- Simply pour your heavy cream into the Instant Pot, and use the “yogurt” setting to boilkeep it at just the right temperature for 8-10 hours before cooling fully. The clotted cream will separate from the watery whey and can be scooped off, as you see in the picture above.
- This is a great use for your Instant Pot if you have one!
- Check out the full post for all the details.

Pros and Con’s of the Instant Pot Method:
Pros
- This method is pretty hands off, and relatively foolproof because of the precise temperature settings of the Instant Pot
- The Instant Pot makes an authentic tasting clotted cream with that telltale “crusty” top
Cons
- Requires specialized equipment in the form of the Instant Pot. Some readers have mentioned that because there are so many new models of the Instant Pot coming out with slightly different settings and buttons, you may have to experiment with yours to find just the right method.
- This recipe takes a bit of time in order to work well, so plan ahead.
Method 2: Oven Clotted Cream (click here for the full recipe)

How the oven method works:
- This method requires and oven that goes down to 180 F in order to work. An oven thermometer is a good way to double check that your oven is displaying the correct temperature.
- The cream is added to an oven safe dish, and left overnight at 180F before removing from the oven, cooling, and then chilling in the fridge. At that point the clotted cream will have separated from the watery whey, and you can simply scoop it off and keep it in a jar.
- Check out the full post for all the details.
Pros and Con’s of the Oven Method
Pros
- This method is pretty straightforward, without a lot of phases and steps, and a lot of readers have had success with it. Like the Instant Pot method, you also get that nice “crust” on the top of your clotted cream.
Cons
- Not all ovens go down to 180F, so check yours before trying this recipe out. And many ovens aren’t accurate, so it really helps to double check with an inexpensive oven thermometer.
- It’s important to use the right sized dish so that your cream is no more than a couple of inches deep.
- Like the Instant Pot method, this method also takes a long time with overnight or all day cooking, then cooling and chilling.
Method 3: Stove Top Clotted Cream (click here for the full recipe)

How the stove top method works:
- This method is very different from the other two – essentially you are cooking off a lot of the water in the cream on the stove top rather than separating the cream from the whey.
- Heavy cream gets reduced on the stovetop, and then poured into a container to cool fully.
- You’ll need a sturdy, heavy bottomed saucepan so the cream won’t scorch as it cooks.
- There’s no skimming off the actual clotted cream here after it cools, everything you pour into your dish after reducing will become thick, clotted cream as it cools, as you can see from the picture above.
- Check out the full post for all the details.

Pros and Cons of the Stove Top Method
Pros
- This is probably the easiest method of them all, with no special equipment or specific temperature settings required.
- It’s also probably the most foolproof, as long as you cook your cream long enough to reduce it according to the recipe instructions.
- You can use any type of heavy or whipping cream for this method, even ultra-pasteurized.
- This is by far the quickest method ~ your cream will be thick and spreadable within about an hour.
Cons
- Although this definitely scratches the clotted cream itch for me, the texture is a little different from the first two, and lacks the same “crusty” top that some consider to be integral to the clotted cream experience.
- Requires more hands-on cooking time at the stovetop while the cream reduces, though the overall time is shorter.
Recipes to go with your homemade clotted cream

- Rhubarb Scones
- Classic Cream Scones Recipe
- Darina Allen’s Irish Soda Scones
- English Crumpets
- Fresh Tangerine Scones
- Fresh Strawberry Scones
Jams and Jellies

- Simple Blackberry Jam
- Rhubarb Vanilla Bean Jelly
- Clementine Jam
- Pink Grapefruit and Vanilla Bean Jam
- Simple Strawberry Jam, European Style
ways to use clotted cream as an ingredient

- Cornish Clotted Cream Shortbread ~ this extra special shortbread is made with clotted cream.
- Fall Fruit Tart with Mascarpone (just sub in clotted cream for the mascarpone.)
- Classic Victoria Sponge Cake Recipe~ spread clotted cream under the jam, between the layers.


Can I double the amount of cream used?
I would divide it into 2 containers if using the oven method. For the Instant Pot, no. For the stove top yes, but it will take much longer to cook down, use a wide pot like a Dutch oven.
Could a yogurt making machine be used instead of an instapot?
Yogurt machines run at a much lower temperature, so I don’t think that will work, unless yours has a thermostat that you can change to 180F.
I’ve made clotted cream often. I’m very excited to try the stovetop method since it can be made with ultra-pasteurized heavy cream! Is there a recipe for the scones at the beginning of the post? Sliced almonds on top—
Yes, the stove top method is a game changer. And the scones would be my cream scones, just use almond extract and top with the almonds!
I made clotted cream using the Instant Pot method and it was extremely successful and very easy! I found the not ultra-pasteurized cream at Whole Foods, put it in the Instant Pot Friday morning, fridged it overnight, and it was ready for scooping Saturday morning. Thanks for such clear directions; I will definitely make this again.
You are one of the best exciting food cooks, sharing ideas and recipes